Welcome to our blog. This is the first ever 390 Design post on here so we wanted to do something special. If you have our Facebook page then you know about our pieces. If you don't have our Facebook page then go hit the LIKE button now at 390 Design.
You are about to see the care, quality and attention to detail that goes into the process, design, and finishing of a 390 Design piece.
A special thanks to my new assistant Deanna Rio for the help on this amazing, one-of-a-kind island.
A few months ago I acquired an old table base that had an asbestos tile top. The base was kind of cool with a ton of potential. It's one of those bases that had "the look". You know the look we are talking about, the cracked paint, and the natural worn distressed look. I started out by removing the asbestos top and wood that held the top on, taking this table back to the base.

The bottom of the table has a poorly built shelf out of scraps that had to be removed.


After removing the bottom shelf it was time to set the base aside and start designing and building the top. For the top of this island we went with a built in cutting board style top. To achieve the durability you need for that to happen you need a tough, hard wood. We decided to go with salvaged 2x4 Heart Pine boards. After locating the Heart Pine it was time to put the 2x4's together. First the boards had to be laid out for dimension and positioning. Heart Pine is a rough wood. It has a ton of twists, cracks and bends, and is almost never the same in two different planks. Laying it out first before you just start cutting is key to a quality look and finish.

The Heart Pine has to be cut to fit the island. We went with an inch of over hang around the whole piece. After making sure the wood was positioned and the desired look was achieved, we T-squared off on both sides and made the cuts. Next we added straight marks to the wood so we knew where the biscuits would go and and a triangular mark so we would know which way the boards go back together after moving them around.

Before doing any more cutting or marking we got the pipe clamps ready for the assembly phase.

Next we got out the hand planer to plane the sides of the Heart Pine 2x4's. The reason for planing them is because of the uneven nature of the boards. If you don't plane the sides before putting in the biscuits, your top may have a tough time joining up, which makes for more work later to fill the gaps. For a smooth plane, the planer was set to 1/32nd, so it just took out the rough surface.


Now that the wood was planed, the next step is to get out the biscuit cutter and go to work.


After making the biscuit cuts, installing the biscuits and gluing the boards together, it was time to add the pipe clamps and start the tightening process.
When putting your pipe clamps on remember to alternate the clamps so you don't get an uneven rise in the top. If you put all of your clamps on the top it will bow. Start on both ends and work your way in, alternating from top and then bottom. Tighten and adjust as you go, but wait to do the final tighten till all clamps are on.


After we assembled the top it was set aside in the clamps for 24 hours to fully dry and cure.
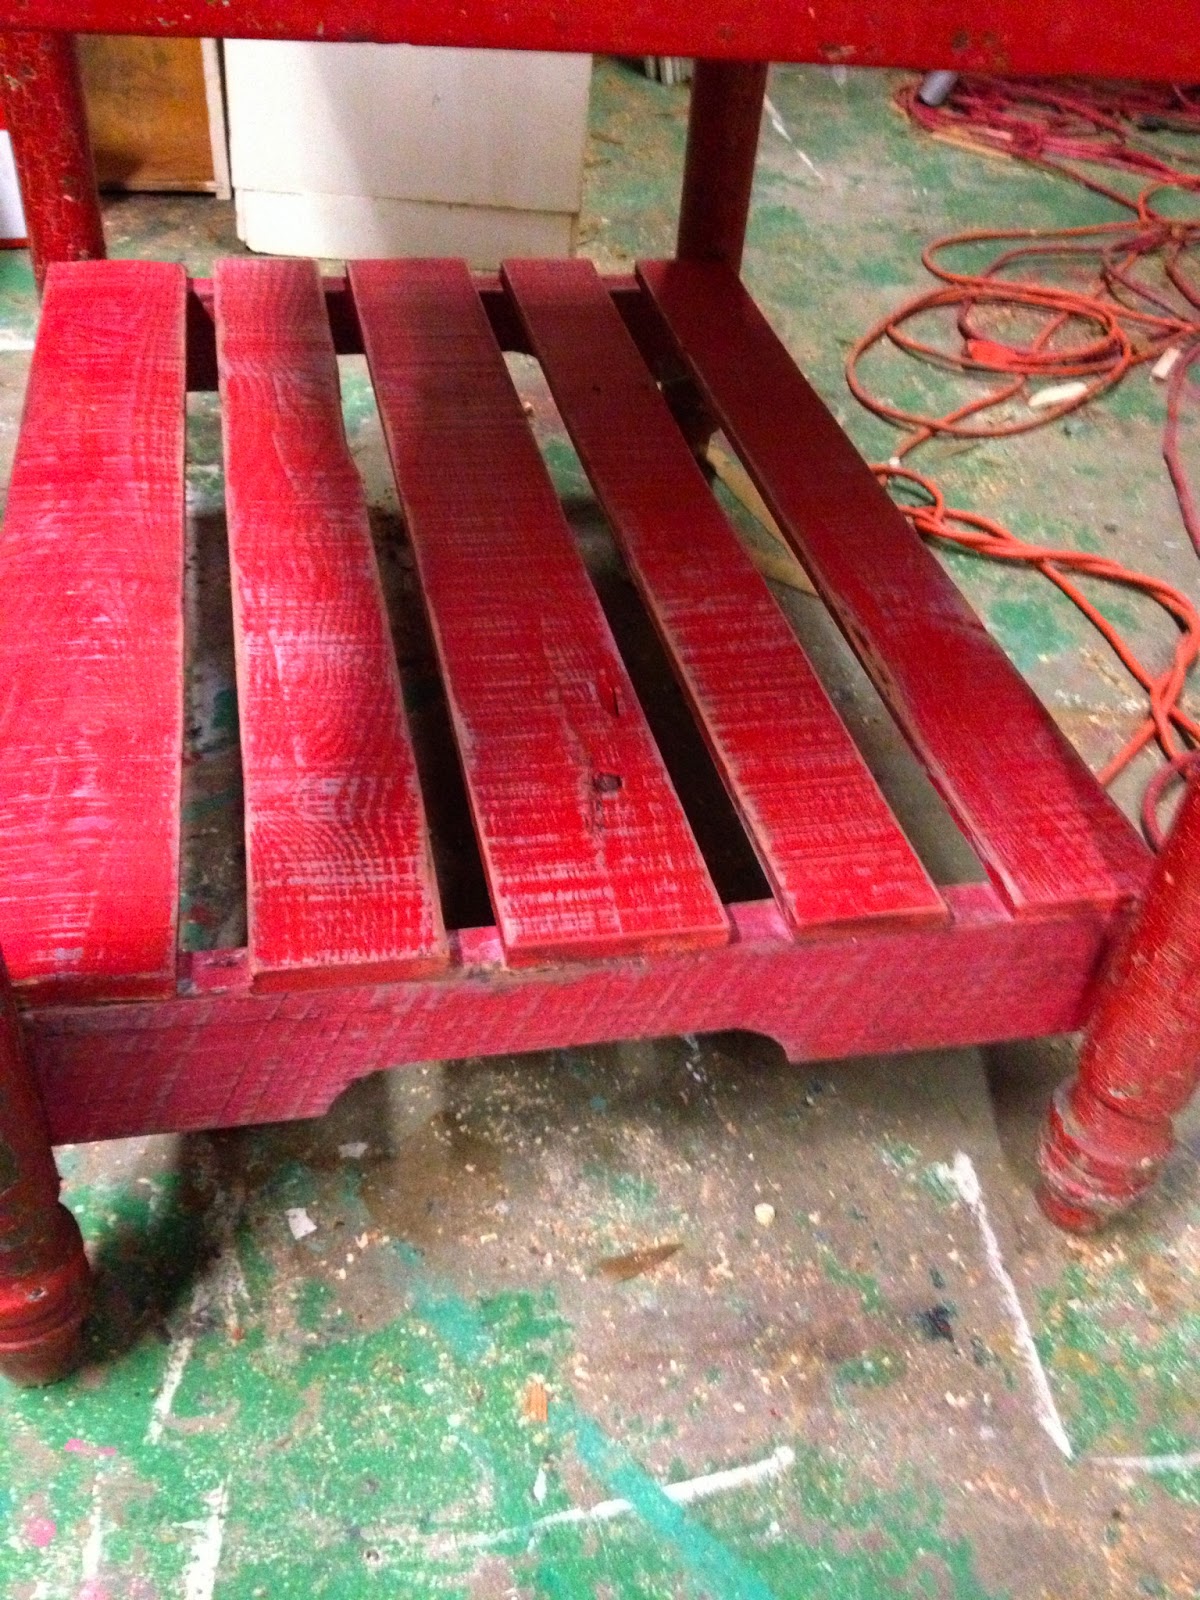
While waiting for the top to dry it was decided that the bottom shelf of the island was going to be re-built to resemble a pallet. We located a pallet and deconstructed it with a reciprocating saw.


After the pallet wood was cut apart, the base was measured and the pieces were laid out and cut to fit. The wood that made up the shelf bottom was run through the table saw and cut to 3 inches in width to insure the planks looked even. The supports for the shelf were cut from the base of the pallet so the fork slots showed for that WOW effect. Next the pieces were painted with a Milk Pail color from a Martha Stewart paint collection for the highlight, and an Indiscreet red from Behr for the main color. After the paint dried the boards were sanded, stained with Early American stain from Minwax, and dark waxed for the finishing touch.


After the pallet shelf was installed the base still had a wobble to it so we added extra bracing to the inside. We used the old wood, from the old bottom shelf, and cut it to fit exact. The end result was a stronger base with hardly no wobble. To take care of any other wobble, the sides of the base were air-nailed to the legs. After the base was nailed no wobble existed.

After the shelf was on and new bracing in we decided to make some storage accents out of the rest of the deconstructed pallet. On one side we wanted a storage rack and the other a towel rack. The storage rack started with cutting pallet wood to fit the design we selected. The wood was then painted Milk Pail, distressed, stained and dark waxed to match the rest of the island.


The main drawer that originally came with the piece was black which gave a great opportunity to make it stand out. It ended up being painted Milk Pail, distressed and dark waxed. The original wooden handle was removed due to it being boring and we started to prep a doorknob to go in its place for the pull. The knob you see us prepping in the photos below actually broke in process so a decorative metal knob ended up gracing the island as the final pull.
To install the knob we took a long piece of 3/8 inch dowel, cut a 2 inch piece from that dowel, sanded it on the belt sander to a pencil point and hammered it into the hole on the back of the knob.

The knob was installed with a 2 inch fine thread drywall screw and a washer for support.


After the drawer was finished it was time to install the assembled towel rack. We made the towel rack from pallet bottom scraps and an old croquette handle. The handle was a fun and great addition to complete the made-from-salvage look.
For a professional install we did not want ANY screws showing so all holes were drilled and then pegged with dowel to plug the holes.


Now that the base is done for now, time to move on to the top.
To get the rough outer layer of the Heart Pine off without going through 8 million pieces of sand paper, the planer was used, set to 1/16th and planed to a semi-even finish. We did not want this to be planed perfect, because the island is primitive in looks and not perfect.


After the top was planed it was sanded down using our trusty Porter Cable orbital sander.
The sandpaper used was 80, then 120, then 220 grit. By using all three grits a smooth even surface is reached.
Since this is going to be a cutting board we didn't want any deep holes and cracks. This is for food safety, so we plugged all the cracks and holes with a super durable epoxy tinted black for a primitive look.


The epoxy was put on just like a wood filler then the excess was removed with a razor blade and the orbital sander.


When the epoxy is taken off the surface it gets rough again so finishing the top off with some 220 is a great idea to get it ready for the FDA approved Good Stuff. Good Stuff is a sealer and conditioner for butcher blocks. This makes the top safe for foods and gives a golden shine. We acquired our quart sized can from Grizzly. Apply Good Stuff to your UNTREATED surface.


Before installing the finished and treated top we need it to be able to attach to the base. We built an attachment frame from the rest of the pallet bottoms we had. There was also another reason for this method.
With the top on, the island sat a couple of inches short, so by adding this attachment we raised the top up and completed the look.
We 45'd the pallet sections on our miter saw, then drilled in and attached the frame with 2 inch wood screws and nailed any existing gaps on the ends with the air nail gun. To get the top to attach to the frame we drilled holes into the overhanging pieces of pallet, from the bottom up, and ran 2 inch screws up through the bottom.


Finally the top goes on and the piece is complete after 9 days of fun.
Enjoy the finished pics, and don't forget to LIKE us on Facebook!
Please also feel free to contact us by email with any questions at
390design@gmail.com
Enjoy the finished pics, and don't forget to LIKE us on Facebook!
Please also feel free to contact us by email with any questions at
390design@gmail.com
Thanks for viewing


No comments:
Post a Comment